Showing posts with label Lots of math. Show all posts

Friday, August 20, 2021

The Central Slice Theorem: An Example

The central slice theorem is key to understanding tomography. In Intermediate Physics for Medicine and Biology, Russ Hobbie and I ask the reader to prove the central slice theorem in a homework problem. Proofs are useful for their generality, but I often understand a theorem better by working an example. In this post, I present a new homework problem that guides you through every step needed to verify the central slice theorem. This example contains a lot of math, but once you get past the calculation details you will find it provides much insight.

The central slice theorem states that taking a one-dimensional Fourier transform of a projection is equivalent to taking the two-dimensional Fourier transform and evaluating it along one direction in frequency space. Our “object” will be a mathematical function (representing, say, the x-ray attenuation coefficient as a function of position). Here is a summary of the process, cast as a homework problem.

Section 12.4 

Problem 21½
. Verify the central slice theorem for the object

(a) Calculate the projection of the object using Eq. 12.29,

Then take a one-dimensional Fourier transform of the projection using Eq. 11.59,
 
(b) Calculate the two-dimensional Fourier transform of the object using Eq. 12.11a,
Then transform (kx,ky ) to (θ,k) by converting from Cartesian to polar coordinates in frequency space.
(c) Compare your answers to parts (a) and (b). Are they the same?


I’ll outline the solution to this problem, and leave it to the reader to fill in the missing steps. 

 
Fig. 12.12 from Intermediate Physics for Medicine and Biology, showing how to do a projection.
Fig. 12.12 from IPMB, showing how to do a projection.

The Projection 

Figure 12.12 shows that the projection is an integral of the object along various lines in the direction θ, as a function of displacement perpendicular to each line, x'. The integral becomes


Note that you must replace x and y by the rotated coordinates x' and y'


You can verify that x2 + y2= x'2 + y'2.

After some algebra, you’re left with integrals involving eby'2 (Gaussian integrals) such as those analyzed in Appendix K of IPMB. The three you’ll need are


The resulting projection is


Think of the projection as a function of x', with the angle θ being a parameter.


The One-Dimensional Fourier Transform

The next step is to evaluate the one-dimensional Fourier transform of the projection

The variable k is the spatial frequency. This integral isn’t as difficult as it appears. The trick is to complete the square of the exponent


Then make a variable substitution u = x' + ik2b. Finally, use those Gaussian integrals again. You get


This is our big result: the one-dimensional Fourier transform of the projection. Our next goal is to show that it’s equal to the two-dimensional Fourier transform of the object evaluated in the direction θ.

Two-Dimensional Fourier Transform

To calculate the two-dimensional Fourier transform, we must evaluate the double integral


The variables kx and ky are again spatial frequencies, and they make up a two-dimensional domain we call frequency space.

You can separate this double integral into the product of an integral over x and an integral over y. Solving these requires—guess what—a lot of algebra, completing the square, and Gaussian integrals. But the process is straightforward, and you get


Select One Direction in Frequency Space

If we want to focus on one direction in frequency space, we must convert to polar coordinates: kx = k cosθ and ky = k sinθ. The result is 

This is exactly the result we found before! In other words, we can take the one-dimensional Fourier transform of the projection, or the two-dimensional Fourier transform of the object evaluated in the direction θ in frequency space, and we get the same result. The central slice theorem works.

I admit, the steps I left out involve a lot of calculations, and not everyone enjoys math (why not?!). But in the end you verify the central slice theorem for a specific example. I hope this helps clarify the process, and provides insight into what the central slice theorem is telling us.

Friday, January 15, 2021

Projections and Filtered Projections of a Square

Chapter 12 of Intermediate Physics for Medicine and Biology describes tomography. Russ Hobbie and I write

The reconstruction problem can be stated as follows. A function f(x,y) exists in two dimensions. Measurements are made that give projections: the integrals of f(x,y) along various lines as a function of displacement perpendicular to each line. For example, integration parallel to the y axis gives a function of x,
as shown in Fig. 12.12. The scan is repeated at many different angles θ with the x axis, giving a set of functions F(θ, x'), where x' is the distance along the axis at angle θ with the x axis.

One example in IPMB is the projection of a simple object: the circular top-hat

The projection can be calculated analytically

It’s independent of θ; it looks the same in every direction.

Let’s consider a slightly more complicated object: the square top-hat

This projection can be found using high school geometry and trigonometry (evaluating it is equivalent to finding the length of lines passing through the square at different angles). I leave the details to you. If you get stuck, email me (roth@oakland.edu) and I’ll send a picture of some squares and triangles that explains it.

The plot below shows the projections at four angles. For θ = 0° the projection is a rectangle; for θ = 45° it’s a triangle, and for intermediate angles (θ = 15° and 30°) it’s a trapezoid. Unlike the circular top-hat, the projection of the square top-hat depends on the direction.

The projections of a square top-hat, at different angles.

What I just described is the forward problem of tomography: calculating the projections from the object. As Russ and I wrote, usually the measuring device records projections, so you don’t have to calculate them. The central goal of tomography is the inverse problem: calculating the object from the projections. One way to perform such a reconstruction is a two-step procedure known as filtered back projection: first high-pass filter the projections and then back project them. In a previous post, I went through this entire procedure analytically for a circular top-hat. Today, I go through the filtering process analytically, obtaining an expression for the filtered projection of a square top-hat. 

Here we go. I warn you, theres lots of math. To perform the filtering, we first calculate the Fourier transform of the projection, CF(θ,k). Because the top-hat is even, we can use the cosine transform

where k is the spatial frequency.

Next, place the expression for F(θ,x') into the integral and evaluate it. Theres plenty of book-keeping, but the projection is either constant or linear in x', so the integrals are straightforward. I leave the details to you; if you work it out yourself, youll be delighted to find that many terms cancel, leaving the simple result 

To high-pass filter CF(θ,k), multiply it by |k|/2π to get the Fourier transform of the filtered projection CG(θ,k)

Finally, take the inverse Fourier transform to obtain the filtered projection G(θ,x'


Inserting our expression for CG(θ,k), we find

This integral is not trivial, but with some help from WolframAlpha I found

where Ci is the cosine integral. I admit, this is a complicated expression. The cosine integral goes to zero for large argument, so the upper limit vanishes. It goes to negative infinity logarithmically at zero argument. Were in luck, however, because the four cosine integrals conspire to cancel all the infinities, allowing us to obtain an analytical expression for the filtered projection

We did it! Below are plots of the filtered projections at four angles. 

The filtered projections of a square top-hat, at different angles.

The last thing to do is back project G(θ,x') to get the object f(x,y). Unfortunately, I see no hope of back-projecting this function analytically; its too complicated. If you can do it, let me know.

Why must we analyze all this math? Because solving a simple example analytically provides insight into filtered back projection. You can do tomography using canned computer code, but you won’t experience the process like you will by slogging through each step by hand. If you don’t buy that argument, then another reason for doing the math is: it’s fun!

Friday, December 27, 2019

The Magnetic Field of an Axon: Ampere versus Biot-Savart

In Homework Problem 14 of Chapter 8 in Intermediate Physics for Medicine and Biology, Russ Hobbie and I ask the reader to calculate the magnetic field produced by the action current in a nerve axon using the law of Biot and Savart, and to compare it with the result found using Ampere’s law. This is a useful exercise, but I’ve always been uncomfortable with one aspect of the calculation. I’ll explain what I mean in today’s post.

In the homework problem you assume the intracellular current is uniform along one section of the axon, and is zero elsewhere (this is a big assumption, but it lets you derive an analytical solution). When you calculate the magnetic field using the law of Biot and Savart, you get a smooth, continuous function valid for any position along the axon. However, when you use Ampere’s law the result seems like it should be discontinuous. For some positions the intracellular current contributes to the current enclosed by the Amperian loop, but for other positions the intracellular current is zero and contributes nothing. How can the magnetic field be smooth and continuous if the intracellular current is discontinuous?

Below I’ll show you an elegant way to resolve this paradox. The bottom line is that the magnetic field you calculate using Ampere’s law is the same continuous function that you’d get using the law of Biot and Savart. I’ll change the details so that you don’t solve the homework problem in the book exactly, but the fundamental idea works for the book’s problem too.

A uniform intracellular current I0 extending from x = -b to x = b, in a nerve axon.

Let the intracellular current be I0 for −b < x < b, and zero elsewhere, where x is the position along the axon (see the figure above). The axon is surrounded by saline with conductivity σ. The calculation consists of four steps: First calculate the extracellular voltage Ve in the saline, then differentiate Ve to find the x-component of the extracellular current density Jx, next integrate the current density across the area of the Amperian loop to get the return current Iret (that part of the extracellular current that passes through the loop), and finally determine the net current enclosed by the loop and calculate the magnetic field B.

Case 1: x > b

The current density and magnetic field surrounding a nerve axon; x>b.
Begin by calculating the magnetic field at point (x,y) where x > b, so you’re in the region where there is no intracellular current threading the Amperian loop (the green circle in the figure above, having radius r). To determine the extracellular voltage, realize that current crosses the membrane at only two locations: x = b (a positive point source when viewed from the extracellular space) and x = −b (a negative point source). The voltage produced by a point source is inversely proportional to the distance, so
A mathematical expression for the voltage in the saline surrounding a nerve axon.
(If you don’t follow how I derived this expression, see Section 7.1 in IPMB.)

To find the x-component of the current density, differentiate Ve with respect to x, multiple by σ, and add a minus sign.
A mathematical expression for the current density in the saline surrounding a nerve axon.
A drawing showing how to integrate the current density over the area of the Amperian loop to get the return current.

The most difficult part of the calculation is integrating the current density over the area enclosed by the loop to find the return current. This is a two-dimensional integral, with an area element of 2πy dy and limits of the integration from 0 to r (see the figure on the right).

You can look up the needed integral in an integral table, evaluate it at the limits, and fill in any missing steps. The result is

A mathematical expression for the return current through the Amperian loop.

The second term in the brackets is equal to minus one and the fourth term is equal to plus one, which cancel. There is no intracellular current for x > b, so the current enclosed by the loop is just the return current. The magnetic field is
A mathematical expression for the magnetic field produced by a nerve axon.
(I switched the order of the two surviving terms and brought the minus sign inside the bracket.) This is exactly the solution you get using the law of Biot and Savart; if you don’t believe me, calculate it yourself.

Case 2: −b < x < b

The current density and magnetic field surrounding a nerve axon; -b<x<b.
The calculation for the extracellular potential, current density, and return current in the region −b < x < b is exactly as before

A mathematical expression for the return current through the Amperian loop.

Now comes the interesting part. The second term in the brackets is not equal to minus one as it was earlier. Because x < b the numerator is negative, but the denominator is squared inside the square root so it is positive; the term becomes plus one. Because x > −b the fourth term is also equal to plus one, as before (both the numerator and denominator are positive). These two terms no longer cancel, so the return current becomes

A mathematical expression for the return current inside the Amperian loop. Because -b<x<b, the second and fourth terms no longer cancel, and the expression inside the brackets contains an extra term "+2".

This is different than we found for x > b. Don’t panic; remember that the total current enclosed by the loop is the return current plus the intracellular current. In this case, the intracellular current I0 exactly cancels the +2 term inside the brackets in the expression for Iret (remember, there is a minus one half in front of the brackets), so the enclosed current is just what we had for the x > b case, and the magnetic field is again

A mathematical expression for the magnetic field produced by a nerve axon.
The equation for the magnetic field is the same for any value of x (you can check the x < −b case yourself; you’ll get the same equation). The “magic” comes from the term (xb)/√(xb)2 switching from negative to positive, which is exactly what it had to do to cancel the intracellular current. The enclosed current is continuous even though the intracellular and return currents are not. The magnetic field calculated using Ampere’s law is a smooth function for all x, and is equivalent to the result obtained using the law of Biot and Savart (as it must be). Nice!

One limitation of this calculation is that the action potential has intracellular current only in one direction; a dipole. For an action potential propagating down an axon, the intracellular current first goes in one direction and then in another as the membrane depolarizes and then repolarizes; a quadrupole.

Two oppositely oriented dipoles of current along a nerve axon.
I’ll leave the calculation for this more complicated current distribution as an exercise for you. I suggest you do the calculation using both the Biot-Savart law and Ampere’s law. Enjoy!

Friday, September 27, 2019

The Cauchy Distribution

In an appendix of Intermediate Physics for Medicine and Biology, Russ Hobbie and I analyze the Gaussian probability distribution
An equation for the Gaussian probability distribution.
It has the classic bell shape, centered at mean x with a width determined by the standard deviation σ.

Other distributions have a similar shape. One example is the Cauchy distribution
An equation for the Cauchy probability distribution.
where the distribution is centered at x and has a half-width at half-maximum γ. I initially thought the Cauchy distribution would be as well behaved as any other probability distribution, but it’s not. It has no mean and no standard deviation!

Rather than thinking abstractly about this issue, I prefer to calculate and watch how things fall apart. So, I wrote a simple computer program to generate N random samples using either the Gaussian or the Cauchy distribution. Below is a histogram for each case (N = 1000; Gaussian, x = 0, σ = 1; Cauchy, x = 0, γ = 1).

Histograms for 1000 random samples obtained using the Cauchy (left) and Gaussian (right) probability distribution.

Those samples out on the wings of the Cauchy distribution are what screw things up. The probability falls off so slowly that there is a significant chance of having a random sample that is huge. The histograms shown above are plotted from −20 to 20, but one of the thousand Cauchy samples was about −2400. I’d need to plot the histogram over a range more than one hundred times wider to capture that bin in the histogram. Seven of the samples had a magnitude over one hundred. By contrast, the largest sample from the Gaussian was about 4.6.

What do these few giant samples do to the mean? The average of the thousand samples shown above obtained from the Cauchy distribution is −1.28, which is bigger than the half-width at half-max. The average of the thousand samples obtained from the Gaussian distribution is −0.021, which is much smaller than the standard deviation.

Even more interesting is how the mean varies with N. I tried a bunch of cases, summarized in the figure below.
A plot of the mean versus sample size, for data drawn from the Gassian and Cauchy probability distribution.

There’s a lot of scatter, but the means for the Gaussian data appear to get smaller (closer to the expected value of zero) as N gets larger, The red line is not a fit, but merely drawn by eye. I included it to show how the means fall off with N. It has a slope of −½, implying that the means decay roughly as 1/√N. In contrast, the means for the Cauchy data are large (on the order of one) and don’t fall off with N. No matter how many samples you collect, your mean doesn’t approach the expected value of zero. Some oddball sample comes along and skews the average.

If you calculate the standard deviations for these cases, the problem is even worse. For data generated using the Cauchy distribution, the standard deviation grows with N. For N over a million, the standard deviation is usually over a thousand (remember, the half-width at half-max is one), and for my N = 5,000,000 case the standard deviation was over 600,000. Oddballs dominate the standard deviation.

I’m sorry if my seat-of-the-pants experimental approach to analyzing the Cauchy distribution seems simplistic, but for me it provides insight. The Cauchy distribution is weird, and I’m glad Russ and I didn’t include an appendix about it in Intermediate Physics for Medicine and Biology.

Friday, June 7, 2019

Slice Selection During Magnetic Resonance Imaging

In Chapter 18 of Intermediate Physics for Medicine and Biology, Russ Hobbie and I discuss magnetic resonance imaging. The first step in most MRI pulse sequences is to excite the spins in a slice of the sample. Three magnetic fields are required: A static field B0 in the z direction that aligns the spins, a magnetic field gradient G in the z direction that selects a slice with thickness Δz, and a radiofrequency field in the x direction Bx(t) that excites the spins.

The three magnetic fields applied during slice selection for magnetic resonance imaging: A static field, a gradient field, and a radiofrequency field.

The RF signal is called a π/2 pulse because it rotates the spins through an angle of 90 degrees (π/2 radians), from the z direction to the x-y plane. The Larmor frequency (the angular frequency at which the spins precess at the center of the slice, z = 0) is ω0 = γB0, where γ is the gyromagnetic ratio. Figure 18.23a of IPMB shows the RF signal as a function of time t: an oscillation at the Larmor frequency modulated by the sinc function.

Figure 18.23a of Intermediate Physics for Medicine and Biology, showing the radiofrequency signal used as a π/2 pulse during slice selection.
Figure 18.23a of IPMB, showing the radiofrequency signal
used as a π/2 pulse during slice selection.

Figure 18.24 illustrates part of the pulse sequence, showing when the RF pulse (Bx, top) and the gradient (G, bottom) are applied.

From Figure 18.24 of Intermediate Physics for Medicine and Biology, showing the part of the pulse sequence responsible for slice selection.
From Figure 18.24 of IPMB, showing the part of the
pulse sequence responsible for slice selection.

Did you ever wonder how the spins behave during this part of the pulse sequence? Do the spins flip all at once near the center of the π/2 pulse, or gradually throughout its duration? Why is there a second negative lobe of the gradient after the π/2 pulse is complete? To answer these questions, let’s analyze slice selection using the Bloch equations—the differential equations governing how spins precess in a magnetic field. Our analysis is similar to that in Section 18.5 of IPMB

If we ignore relaxation, the Bloch equations are

The Bloch equations describing the magnetization during slice selection in magnetic resonance imaging.

where Mx, My, and Mz are the components of the magnetization (a measure of the average spin orientation).

Next, let’s transform to a coordinate system (Mx', My', Mz') rotating at the Larmor frequency. I will leave the details of the transformation to you (they are similar to those in Section 18.5.2 of IPMB). We obtain

The Bloch equations in a rotating coordinate system, describing the magnetization during slice selection in magnetic resonance imaging.

In general the Larmor frequency γB0 is much higher than the modulation frequency γGΔz/2 (thousands of oscillations occur within the central lobe of the sinc function rather than the dozen shown in Fig. 18.23a), so we average over many cycles (as in Section 18.5.3 of IPMB). The Bloch equations simplify to

The Bloch equations in a rotating coordinate system, averaged over time, when describing the magnetization during slice selection in magnetic resonance imaging.

Before we can solve this system of three coupled ordinary differential equations, we need to specify the initial conditions. At t = −∞, Mx' = My' = 0 and Mz' = M0, where M0 is the equilibrium value of the magnetization.

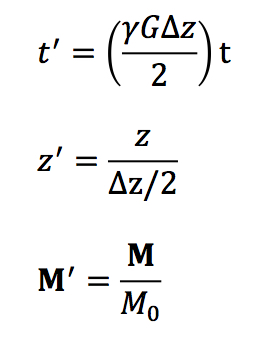
At this point, we define dimensionless variables

Dimensionless variables for time, position, and magnetization, used during slice selection for magnetic resonance imaging.

where M = (Mx, My, Mz). The differential equations become

The Bloch equations in a rotating coordinate system, averaged over time, in terms of dimensionless variables, when describing the magnetization during slice selection in magnetic resonance imaging.

where z' ranges from -1 to 1, and the initial conditions at t' = −∞ are M'x' = M'y' = 0 and M'z' = 1.

I like this elegant system of equations, except all the primes are annoying. For the rest of this post I’ll drop the primes. Your job is to remember that these are dimensionless coordinates in a rotating coordinate system.

The Bloch equations in a rotating coordinate system, averaged over time, in terms of dimensionless variables, when describing the magnetization during slice selection in magnetic resonance imaging. The annoying primes are removed.

I wanted to solve these equations analytically, but couldn’t. I tried weird guesses involving the sine integral and sometimes I thought I was close, but none of my attempts worked. If you, dear reader, find an analytical solution, send it to me. You will be my hero forever.

Having no analytical solution, I wrote a simple Matlab program to solve the equations numerically.
dt=pi/1000;
T=10*pi;
nt=2*T/dt;
dz=0.05;
nz=2/dz+1;
for j=1:nz
    mx(1,j)=0;
    my(1,j)=0;
    mz(1,j)=1;
    z(j)=-1+(j-1)*dz;
    end
t(1)=-T;
for i=1:nt-1
    t(i+1)=t(i)+dt;
    for j=1:nz
        mx(i+1,j)=mx(i,j) + dt*z(j)*my(i,j);
        my(i+1,j)=my(i,j) + dt*(0.5*sin(t(i))/t(i)*mz(i,j) - z(j)*mx(i,j));
        mz(i+1,j)=mz(i,j) - dt*0.5*sin(t(i))/t(i)*my(i,j);
        end
    end
A few notes:
  • I didn’t use a fancy numerical technique, just Euler’s method. To ensure accuracy, I used a tiny time step: Δt = π/1000. If you are not familiar with solving differential equations numerically, see Section 6.14 in IPMB.
  • The sinc function, sin(t)/t, ranges from −∞ to +∞. I had to truncate it, so I applied the RF pulse from −10π to +10π. The middle, tall phase of the sinc function is centered at t = 0.
  • I actually used the software Octave, which is a free version of Matlab. I recommend it.
My results are shown below: Mx(t) (blue), My(t) (red), and Mz(t) (yellow) for different values of z, plotted for t from −10π to +10π.

The magnetization Mx, My, and Mz as functions of time and at several positions within the slice, during slice selection in magnetic resonance imaging.
More notes:
  • Mx is an odd function of z, whereas My and Mz are even. 
  • Mz changes most rapidly during the central phase of the sinc function. 
  • At z = 0, Mz rotates to My and then sits there constant. Remember, we are in the rotating coordinate system; in the laboratory coordinate system the spins precess at the Larmor frequency.
  • As z increases, the magnetization rotates in the x-y plane for times greater than zero. The larger |z|, the higher the frequency; the local precession frequency increasingly differs from the frequency of the rotating coordinate system. 
  • I don’t show z = ±1. Why not? The RF pulse was designed to contain frequencies corresponding to z between -1 and 1, so z = 1 is just on the edge of the slice. What happens outside the slice? The figure below shows that the RF pulse is ineffective at exciting spins at z = 1.25 and 1.5. At exactly z = 1 the signal is just weird.
The magnetization Mx, My, and Mz as functions of time and at several positions outside the slice, during slice selection in magnetic resonance imaging.

In an MRI experiment we don’t measure the magnetization at each value of z individually, but instead detect a signal from the entire slice. Therefore, I averaged the magnetization over z. Mx is odd, so its average is zero. The averages of My and Mz are shown below.

The magnetization Mx, My, and Mz as functions of time, averaged over the slice, during slice selection in magnetic resonance imaging.

The behavior of My is interesting. After its central peak it decays back to zero because at all the different values of z the spins precess at different frequencies and interfer with each other (they dephase). When averaged over the entire slice, My is nearly zero except briefly around t = 0.

We want My to get big and stay big. Therefore, we need to rephase the spins after they dephase. The second lobe of the gradient field does this. All the plots so far are for times from −10π to +10π, and the gradient G is on the entire time. Now, let’s extend the calculation so that for times between 10π and 20π the gradient is present but with opposite sign (like in Fig. 18.24) and the RF pulse is off. After time 20π, the gradient also turns off and the only magnetic field present is B0. The figure below shows the behavior of the spins.

The magnetization Mx, My, and Mz as functions of time, averaged over the slice, during slice selection in magnetic resonance imaging. This calculation includes the negative lobe of the gradient magnetic field that produces the echo.

We did it! When averaged over the entire slice, My (the red trace) eventually increases, reaches one, and then stays one. It remains constant for times greater than 20π because we ignore relaxation. The bottom line is that we found a way to excite the spins in the slice so they are all aligned in the y direction (in the rotating coordinate system), and we are ready to apply other fancy pulse sequences to extract information and form an image.

How did this miracle happen? The key insight is that the gradient produces an echo, much like in echo planar imaging. My decays after time zero because the spins diphase, but changing the sign of the gradient rephases the spins, so they are all lined up again when we turn the gradient off at t = 20π. We produce an echo without using a π pulse; it’s a gradient echo (if you didn’t understand that last sentence, study Figures 18.31 and 18.32 in IPMB).

Until I did this calculation, I didn’t realize that the second phase of the gradient is so crucial. I thought it corrected for a small phase shift and was only needed for high accuracy. No! The second phase produces the echo. Without it, you get no signal at all. And you have to turn it off at just the right time, or the spins will dephase again and the echo will vanish. The second lobe of the gradient is essential; the whole process fails without it.

I learned a lot from analyzing slice selection; I hope you did too.