Friday, May 26, 2017

Confocal Microscopy

Russ Hobbie and I don’t talk much about microscopy in Intermediate Physics for Medicine and Biology. In the homework problems to Chapter 14 (Atoms and Light) we describe the compound microscope, but that is about it. Physics, however, plays a big role in microscopy. In this post, I attempt to explain the physics behind the confocal microscope. I leave out much, but I hope this explanation conveys the essence of the technique.

Start with a simple converging lens. The lens is often indicated by a vertical line with triangles on the top and bottom, but this is shorthand for the dashed concave lens shown below. Assume this is the objective lens of your microscope. A lens has two focal points. Light originating at the left focal point exits the lens horizontally (yellow), like in a searchlight. Light coming from a distant object (purple) converges at the right focal point, like in a telescope.
A ray diagram showing how an objective lens works.
When an object is not so distant, the light converges at a point beyond the focal point; the closer the object, the farther back it converges. You can calculate the point where the light converges using the thin lens equation (Eq. 14.64 in IPMB). Below I show three rays originating at different positions in a sample of biological tissue. The colors (green, blue, and red) do not indicate different wavelengths of light; I use different colors so the rays are easier to follow. Light originating deep in the sample (green) converges just beyond the right focal point, but light originating near the front of the sample (red) converges far beyond the focal point. This is why in a camera you can adjust the focus by changing the distance from the lens to the detector.
A ray diagram showing how an ojective lens focus objects at different distances away at different locations.
Suppose you wanted to detect light from only the center of the sample. You could put an opaque screen containing a small pinhole beyond the focal point of the lens, just where the blue rays converge. All the light originating from the center of the sample would pass through the pinhole. The light from deep in the sample (green) would be out of focus, so most of this light would be blocked by the screen. Likewise, light from the front of the sample (red) is even more out of focus, and only a tiny bit passes through the pinhole. So, voilá, the light detected beyond the pinhole is almost entirely from the center of the sample.
A ray diagram that shows how a pinhole can be used to make a confocal microscope, that images only one plane in an object.
Do you want to view a different depth? Just move the screen/pinhole to the right or left, and you can image shallower or deeper positions.
Another ray diagram that shows how a pinhole can be used to make a confocal microscope, that images only one plane in an object.
In this way, you build up an image of the sample as a function of depth.

How do you get information in the plane at one depth? In confocal microscopy, you usually scan a laser at different positions in the x,y plane (taking z as the distance from the lens). Pixel by pixel, you build up an image, then adjust the position of the screen and build up another image, and then another and another.

Often, confocal microscopy is used with samples that emit fluoresced light. You shine the narrow laser beam of short-wavelength light onto the sample from the left. The sample then emits long-wavelength light as molecules in the sample fluoresce. You can filter out the short-wavelength light, and just image the long-wavelength light. Biologists play all kinds of tricks with fluorescence, such as attaching a fluorescent molecule to the particular structure in the sample they want to image.

There are advantages and disadvantages of a confocal microscope. On advantage is that your detector, positioned to the right of the screen/pinhole, need not be an array like in a camera. A single detector is sufficient; you build up the spatial information by scanning the laser beam (x,y) and the pinhole (z) to obtain full three-dimensional information that you can then manipulate with a computer to create informative and beautiful pictures. One disadvantage is that you have to scan both the laser and the pinhole in synchrony, which is not easy. All this scanning takes time, although video-rate scans are possible using modern technology. Also, most of your fluoresced light gets blocked by the screen, so you need an intense light source that may bleach of your fluorescent tag.

The confocal microscope was invented by Marvin Minsky, who died last year after a productive career in science. Minsky was an undergraduate physics major who went on to study mathematics, computer science, artificial intelligence, robotics, and consciousness. Isaac Asimov claimed in his biography In Joy Still Felt that only two people he knew were more intelligent than he was: Carl Sagan and Minsky. Marvin Minsky and his confocal microscope illustrate the critical role of physics in medicine and biology.

Friday, May 19, 2017

Applying Magneto-Rheology to Reduce Blood Viscosity and Suppress Turbulence to Prevent Heart Attacks

Recently, Russ Hobbie pointed out to me an abstract presented at the 2017 American Physical Society March Meeting about “Applying Magneto-Rheology to Reduce Blood Viscosity and Suppress Turbulence to Prevent Heart Attacks," by Rongjia Tao.
Heart attacks are the leading causes of death in USA. Research indicates one common thread, high blood viscosity, linking all cardiovascular diseases. Turbulence in blood circulation makes different regions of the vasculature vulnerable to development of atherosclerotic plaque. Turbulence is also responsible for systolic ejection murmurs and places heavier workload on heart, a possible trigger of heart attacks. Presently, neither medicine nor method is available to suppress turbulence. The only method to reduce the blood viscosity is to take medicine, such as aspirin. However, using medicine to reduce the blood viscosity does not help suppressing turbulence. In fact, the turbulence gets worse as the Reynolds number goes up with the viscosity reduction by the medicine. Here we report our new discovery: application of a strong magnetic field to blood along its flow direction, red blood cells are polarized in the magnetic field and aggregated into short chains along the flow direction. The blood viscosity becomes anisotropic: Along the flow direction the viscosity is significantly reduced, but in the directions perpendicular to the flow the viscosity is considerably increased. In this way, the blood flow becomes laminar, turbulence is suppressed, the blood circulation is greatly improved, and the risk for heart attacks is reduced. While these effects are not permanent, they last for about 24 hours after one magnetic therapy treatment.
The report is related to an earlier paper by Tao and Ke Huang “Reducing Blood Viscosity with Magnetic Fields” (Phys Rev E, Volume 84, Article Number 011905, 2011). The APS published a news article about this work.

I have some concerns. Let’s use basic physics, like that discussed in Intermediate Physics for Medicine and Biology, to make order-of-magnitude estimates of the forces acting on a red blood cell.

First, we’ll estimate the dipole-dipole magnetic force. A red blood cell has a funny shape, but for our back-of-the-envelope calculations let’s consider it to be a cube 5 microns on a side. The magnetization M, the magnetic field intensity H, and the magnetic susceptibility χm are related by M = χm H (Eq. 8.31, all equation numbers from the 5th edition of IPMB), and H is related to the applied magnetic field B by B = μo H (Eq. 8.30), where μo is the permeability of free space. The total magnetic dipole of a red blood cell, m, is then a3M (Eq. 8.27), or m = a3χmB/μo. If we use χm = 10-5, B = 1 T, and μo = 4π × 10-7 T m/A, the dipole strength is about 10-15 A m2. The magnetic field produced by this magnetic dipole in an adjacent red blood cell is about μom/(4πa3) = 10-6 T (Eq. 18.32). The force on a magnetic dipole in this nonuniform magnetic field is approximately mB/a = 2 × 10-16 N (Eq. 8.26).

What other forces act on this red blood cell? Consider a cell in an arteriole that has a radius of 30 μm, is 10 mm long, and has a pressure drop from one end of the arteriole to the other of 45 torr = 6000 Pa (see Table 1.4 of IPMB). The pressure gradient dP/dx is therefore 6 × 10⁵ Pa/m. The pressure difference between one side of a red blood cell and the other should be the product of the pressure gradient and the cell length. The force is this pressure difference times the surface area, or a3dP/dx = 8 × 10-11 N. This force is about 400,000 times larger than the magnetic force calculated above.

Another force arises from friction between the fluid and the cell. It is equal to the product of the surface area (a2), the viscosity η, and the velocity gradient (Eq. 1.33). Take the blood viscosity to be 3 × 10⁻³ Pa s. If we assume Poiseuille flow, the average speed of the blood in the arteriole is 0.02 m/s (Eq. 1.37). The average velocity gradient should be the average speed divided by the radius, or about 700 1/s. The viscous force is then 5  × 10-11 N. This is almost the same as the pressure force. (Had we done the calculation more accurately, we should have found the two forces have the same magnitude and cancel each other out, because the blood is not accelerating).

Another small force acting on the red blood cell is gravity. The gravitational force is the density times the volume times the acceleration of gravity (Eq. 1.31). If we assume a density of 1000 kg/m3, this force is equal to about 10-12 N. Even if this overestimates the force of gravity by a factor of a thousand because of buoyancy, it is still nearly an order of magnitude larger than the magnetic force.

These back-of-the-envelope calculations suggest that the dipole-dipole force is very small compared to other forces acting on the red blood cell. It is not obvious how it could trigger cell aggregation.

Let me add a few other points.
  • The abstract talks about suppressing turbulence. However, as Russ and I point out in IPMB, turbulence is only important in the largest vessels of the circulatory system, such as the aorta. In the vast majority of vessels there is no turbulence to suppress. 
  • In their 2011 paper, Tao and Huang claim the change in viscosity is caused by aggregation of blood cells, and their Fig. 3c shows one such clump of about a dozen cells. However, capillaries are so small that blood cells go through them one at a time. Aggregates of cells might not be able to pass through a capillary. 
  • If a magnetic field makes dramatic changes in blood viscosity, then you should experience noticeable changes in blood flow and blood pressure during magnetic resonance imaging, which can expose you to magnetic fields of several tesla. I have not seen any reports of such hemodynamic changes during an MRI. 
  • I would expect that an aggregate of blood cells blocking a vessel could cause a stroke. I have never heard of an increased risk of stroke when a person is exposed to a magnetic field. 
  • Tau and Huang claim that for the dipole interaction energy to be stronger than thermal energy, kT, the applied magnetic field should be on the order of 1 T. I have reproduced their calculation and they are correct, but I am not sure kT is the relevant energy for comparison. A 1 T magnetic field would result in a dipole-dipole interaction energy for the entire red blood cell of about kT. At the temperature of the human body kT is about 1/40 of an electron volt, which is less than the energy of one covalent bond. There are about 1014 atoms making up a red blood cell. Is one extra bond among those hundred million million atoms going to cause aggregation? 
  • The change in viscosity apparently depends on direction. I can see how you could adjust the geometry so the magnetic field is parallel to the blood flow for one large artery or vein, but the arterioles, veinuoles, and especially capillaries are going to be oriented every which way. Blood flow is slower in these small vessels, so red blood cells spend a large fraction of their time in them. I expect that in some vessels the viscosity would go up, and in others it would go down. 
  • Tao claims that the increase in viscosity lasts 24 hours after the magnetic field is turned off. If the dipole-dipole interaction causes this effect, why does it last so long after the magnetic field is gone? Perhaps the magnetic interaction pushes the cells together and then other chemical reactions cause them to stick to each other. But if that were the case, then why are the cells not sticking together whenever they bump into each other as they tumble through the circulatory system? 
  • Finally--and this is a little out of my expertise so I am on shakier ground here--doctors recommend aspirin because of its effect on blot clotting, not because it reduces viscosity.
What lessons can we learn from this analysis? First, I am not convinced that this effect of magnetism on blood viscosity is real. I could be wrong, and I may be missing some key piece of the puzzle. I'm a simple man, and the process may be inherently complex. Nevertheless, it just doesn’t make sense to me. Second, you should always make back-of-the-envelope estimations of the effects you study. Russ and I encourage such estimates in Intermediate Physics for Medicine and Biology. Get into the habit of using order-of-magnitude calculations to check if your results are reasonable.

Friday, May 12, 2017

Free-Radical Chain Reactions that Spread Damage and Destruction

One way radiation damages tissue is by producing free radicals, also known as reactive oxygen species. In Chapter 16 of Intermediate Physics for Medicine and Biology, Russ Hobbie and I discuss these molecules:
High-LET [linear energy transfer] radiation produces so many ion pairs along its path that it exerts a direct action on the cellular DNA. Low-LET radiation can also ionize, but it usually acts indirectly. It ionizes water (primarily) according to the chemical reaction

H2O → H2O+ + e- .

The H2O+ ion decays with a lifetime of about 10-10 s to the hydroxyl free radical:

H2O+ + H2O → H3O+ + OH .

This then produces hydrogen peroxide and other free radicals that cause the damage by disrupting chemical bonds in the DNA.
Free radicals are produced not only by water, but also by oxygen, O2. Tissues without much oxygen (such as the ischemic core of a tumor) are resistant to radiation damage.

Oxygen: The Molecule that Made the World, by Nick Lane, superimposed on Intermediate Physics for Medicine and Biology.
Oxygen, by Nick Lane.
Nick Lane’s book Oxygen: The Molecule that Made the World explains how radiation interacts with tissue through free radicals. In his Chapter 6, “Treachery in the Air: Oxygen Poisoning and X-Irradiation: A Common Mechanism,” he writes:
A free radical is loosely defined as any molecule capable of independent existence that has an unpaired electron. This tends to be an unstable electronic configuration. An unstable molecule in search of stability is quick to react with other molecules. Many free radicals are, accordingly, very reactive…

The three intermediates formed by irradiating water, the hydroxyl radicals, hydrogen peroxide and superoxide radicals, react in very different ways. However, because all three are linked and can be formed from each other, they might be considered equally dangerous…

Hydroxyl radicals (OH) are the first to be formed. These are extremely reactive fragments, the molecular equivalents of random muggers. They can react with all biological molecules at speeds approaching their rate of diffusion. This means that they react with the first molecules in their path and it is virtually impossible to stop them from doing so. They cause damage even before leaving the barrel of the gun…

If radiation strips a second electron from water, the next fleeting intermediate is hydrogen peroxide (H2O2)…Hydrogen peroxide is unusual in that it lies chemically exactly half way between oxygen and water. This gives the molecule something of a split personality. Like a would-be reformed mugger, whose instinct is pitted against his judgement, it can go either way in its reactions….[A] dangerous and significant reaction, however, takes place in the presence of iron, which can pass electrons one at a time to hydrogen peroxide to generate free radicals. If dissolved iron is present, hydrogen peroxide is a real hazard…

The third of our intermediates … [is] the superoxide radical (O2-). Like hydrogen peroxide, the superoxide radical is not terribly reactive. However, it too has an affinity for iron…
In summary, then, the three intermediates between water and oxygen operate as an insidious catalytic system that damages biological molecules in the presence of iron. Superoxide radicals release iron from storage depots and convert it into the soluble form. Hydrogen peroxide reacts with soluble iron to generate hydroxyl radicals. Hydroxyl radicals attack all proteins, lipids and DNA indiscriminately, initiating destructive free-redical chain reactions that spread damage and destruction.
I fear that physics and biology alone are not enough to understand how radiation interacts with tissue; we need some chemistry too.

Friday, May 5, 2017

Magnetic Force Microscopy for Nanoparticle Characterization

In Chapter 8 of Intermediate Physics for Medicine and Biology, Russ Hobbie and I discuss biomagnetism. The 5th edition of IPMB contains a brief new section on magnetic nanoparticles
8.8.4 Magnetic Nanoparticles

Small single-domain nanoparticles (10–70 nm in diameter) are used to treat cancer (Jordan et al. 1999; Pankhurst et al. 2009). The particles are injected into the body intravenously. Then an oscillating magnetic field is applied. It causes the particles to rotate, heating the surrounding tissue. Cancer cells are particularly sensitive to damage by hyperthermia. Often the surface of the nanoparticles can be coated with antibodies that cause the nanoparticle to be selectively taken up by the tumor, providing more localized heating of the cancer.
Suppose you wanted to image the distribution of nanoparticles in tissue. How would you do it? In IPMB we describe several ways to map magnetic field distributions, including using a superconducting quantum interference device (SQUID) magnetometer. Is there a way to get even better spatial resolution than using a SQUID? Gustavo Cordova, Brenda Yasie Lee, and Zoya Leonenko recently published a review in the NanoWorld Journal describing “Magnetic Force Microscopy for Nanoparticle Characterization” (Volume 2, Pages 10–14, 2016). Their abstract states
Since the invention of the atomic force microscope (AFM) in 1986, there has been a drive to apply this scanning probe technique or a form of this technique to various disciplines in nanoscale science. Magnetic force microscopy (MFM) is a member of a growing family of scanning probe methods and has been widely used for the study of magnetic materials. In MFM a magnetic probe is used to raster-scan the surface of the sample, of which its magnetic field interacts with the magnetic tip to offer insight into its magnetic properties. This review will focus on the use of MFM in relation to nanoparticle characterization, including superparamagnetic iron oxide nanoparticles, covering MFM imaging in air and in liquid environments.
Figure 1 from their paper shows how the MFM “two-pass technique” works: a first scan produces a topographical image using an atomic force microscope, and then a second pass creates a magnetic image using a magnetic force microscope. Both the AFM and MFM are based on using a small, nanometer sized scanning tip attached to a cantilever to detect small-scale tip deflections.


Their Figure 2 shows the results of MFM imaging of superparamagnetic iron oxide nanoparticles (SPIONs). The technique has sufficient sensitivity that they can measure how the size distribution of SPIONs depends on the particle coating.


Cordova et al. conclude
Considering rapid development of novel applications of magnetic nanoparticles in medicine and biomedical nanotechnology, as therapeutic agents, contrast agents in MRI imaging and drug delivery [3] MFM characterization of nanoparticles becomes more valuable and desirable. Overall, MFM has proven itself to be an effective yet underused tool that offers great potential for the localization and characterization of magnetic nanoparticles.
The magnetic force microscope does not have the exquisite picotesla sensitivity and millisecond time resolution of a SQUID, and it requires access to the tissue surface so you can scan over it. But for static, strong-field systems such as magnetic nanoparticle distributions, the magnetic force microscope provides exceptional spatial resolution, and represents one more tool in the physicists arsenal for imaging magnetic fields in biology.

Friday, April 28, 2017

The Thermodynamics of the Proton Spin

In Intermediate Physics for Medicine and Biology, Russ Hobbie and I introduce a lot of statistical mechanics and thermodynamics. For instance, in Chapter 3 we describe the Boltzmann factor and the heat capacity, and in Chapter 18 we analyze magnetic resonance imaging by considering the magnetization of the two-state spin system using statistical mechanics. Perhaps we can do a little more.

First, let’s calculate the average energy of a spin-1/2 proton in a magnetic field B. The proton has two states: up and down. Up has the lower energy Eup = -μB, and down has the higher energy Edown = +μB, where μ is the proton’s magnetic moment. Using the Boltzmann factor, the probability of having spin up is Pup = C eμB/kT, and of spin down is Pdown = C e-μB/kT, where T is the absolute temperature and k is Boltzmann’s constant. The spin must be in one of these two states, so Pup + Pdown = 1, or C = 1/(eμB/kT + e-μB/kT). The average energy,E⟩, is PupEup + PdownEdown, or

An equation giving the average energy of spins in a magnetic field B at a temperature T.
The total energy E of the spin system is just the average energy times the number of spins, E = NE.

Equations are not just things you plug numbers into to get other numbers. Equations tell a physical story. So, whenever I teach the two-state spin system I stress the story, which becomes clearer if we examine the limiting cases of this equation. At high temperatures (μB much less than kT), the argument of the hyperbolic tangent is small, we can use a Taylor expansion for the exponentials, and the average energy is –μ2B2/kT. This is the limit of interest for magnetic resonance imaging, when the average energy increases as the square of the magnetic field. At low temperatures (μB much greater than kT), the argument of the hyperbolic tangent is large, tanh goes to one, and the average energy is –μB. All the spins are in the spin up ground state.

Next, let’s calculate the heat capacity, C = dE/dT. The derivative of the hyperbolic tangent is the hyperbolic secant squared, so

An equation for the heat capacity of spins in a magnetic field B at temperature T.
The leading factor is the number of molecules time the Boltzmann constant, which is equal to the number of moles times the gas constant. At high temperatures, C goes to zero because of the leading factor of 1/T2. Physically, this result arises because in this case the spins are approximately half spin up and half spin down, so the average energy is about zero, and making the system even hotter won’t change the situation. You typically see this type of behavior in systems that have an upper energy level (as opposed to, say, a system like the harmonic oscillator that has energy levels at increasing energies without bound). At low temperatures, C also goes to zero because the secant goes to zero at large argument. This result arises because the spin down state freezes out: if the system is cold enough no spins can reach the spin down state so the average energy is simply the energy of the spin up ground state.

The heat capacity going to zero as the temperature goes to zero is one way of stating the third law of thermodynamics. Russ and I discuss the first and second laws of thermodynamics in IPMB, but not the third. This is mainly because life occurs at warm temperatures, so the behavior as T approaches absolute zero does not have much biological significance. But although little biology happens around absolute zero, much physics does. To learn more about the world at low temperatures, I recommend the book The Quest for Absolute Zero, by Kurt Mendelssohn. Fascinating reading.

Friday, April 21, 2017

Erythropoietin and Feedback Loops

In Chapter 10 of Intermediate Physics for Medicine and Biology, Russ Hobbie and I discuss feedback loops. We included two new problems about feedback loops in the 5th edition of IPMB, but as Russ says “you can never have too many examples.” So, here’s another.

The number of red blood cells is controlled by a feedback loop involving the hormone erythropoietin. The higher the erythropoietin concentration, the more red blood cells are produced and therefore the higher the hematocrit. However, the kidney adjusts the production of erythropoietin in response to hypoxia (caused in part by too few red blood cells). The lower the hematocrit the more erythropoietin produced. This new homework problem illustrates the feedback loop. It reinforces concepts from Chapter 10 on feedback and from Chapter 2 on the exponential function, and requires the student to analyze data (albeit made-up data) rather than merely manipulating equations. Warning: the physiological details of this feedback loop are more complicated than discussed in this idealized example.
Section 10.3

Problem 17 ½. Consider a negative feedback loop relating the concentration of red blood cells (the hematocrit, or HCT) to the concentration of the hormone erythropoietin (EPO). In an initial experiment, we infuse blood or plasma intravenously as needed to maintain a constant hematocrit, and measure the EPO concentration. The resulting data are

HCT EPO
(%) (mU/ml)
20 200
30   60.1
40   18.1
50     5.45
60     1.64

In a healthy person, the kidney adjusts the concentration of EPO in response to the oxygen concentration (controlled primarily by the hematocrit). In a second experiment, we suppress the kidney’s ability to produce EPO, control the concentration of EPO by infusing the drug intravenously, and measure the resulting hematocrit. We find

EPO HCT
(mU/ml) (%)
  1 35.0
  2 36.0
  5 39.1
10 45.0
20 59.5

(a) Plot these results on semilog paper and determine an exponential equation describing each set of data.
(b) Draw a block diagram of the feedback loop, including accurate plots of the two relationships.
(c) Determine the set point (you may have to do this numerically).
(d) Calculate the open loop gain.
Biochemist Eugene Goldwasser first reported purification of erythropoietin when working at the University of Chicago in 1977. In his essay “Erythropoietin: A Somewhat Personal History” he writes about his ultimately successful attempt to isolate erythropoietin from urine samples.
Unfortunately the amounts of active urine concentrates available to us from the NIH source or our own collection were still too small to make significant progress, and it seemed as if purification and characterization of human epo might never be accomplished—that it might remain merely an intriguing biological curiosity. The prospect brightened considerably when Drs. M. Kawakita and T. Miyake instituted a very large-scale collection of urine from patients with aplastic anemia in Kumamato City, Japan. After some lengthy correspondence, Dr. Miyake arrived in Chicago on Christmas Day of 1975, carrying a package representing 2550 liters of urine [!] which he had concentrated using our first-step procedure. He and Charles Kung and I then proceeded systematically to work out a reliable purification method…we eventually obtained about 8 mg of pure human urinary epo .
You can learn more about Goldwasser and his career in his many obituaries, for instance here  and here. A more wide-ranging history of erythropoietin can be found here.

Friday, April 14, 2017

Unequal Anisotropy Ratios

In Chapter 7 of Intermediate Physics for Medicine and Biology, Russ Hobbie and I discuss the bidomain model, a mathematical description of the anisotropic electrical properties of cardiac tissue.
Anisotropy plays an important role in the bidomain model. To see why, consider a solution to Laplace’s equation in a monodomain—a two-dimensional sheet of homogeneous, anisotropic tissue with straight fibers. If the x direction is chosen to be along the fiber direction (the direction of greatest conductivity), then Laplace’s equation becomes
 Now define a new set of coordinates
and
 You can show that in these new coordinates Laplace’s equation becomes
We have removed the effect of anisotropy by rescaling distance in the direction perpendicular to the fibers. If you try a similar trick with the bidomain model … you can find a new coordinate system that removes the effect of anisotropy in either the intracellular space or the extracellular space, but in general you cannot find a coordinate system that removes the anisotropy in both spaces simultaneously (Roth 1992).
My 1992 paper (Journal of Mathematical Biology, Volume 30, Pages 633–646) contains one of my favorite figures, which illustrates the importance of bidomain anisotropy visually. It is equivalent to an old concept from mechanics called the simultaneous diagonalization of two quadratic forms.

A liiustration explaining unequal anisotropy ratios using the simultaneous diagonalization of two quadratic forms.

Russ and I continue,
Only in the special case of equal anisotropy ratios (σix/σiy = σox/σoy ) will the equations simplify dramatically. But the anisotropy ratios in the heart are not equal. In the intracellular space the ratio of conductivities parallel and perpendicular to the fibers is about 10:1, while in the extracellular space this ratio is about 4:1 (Roth 1997). Anisotropy plays an essential role in the electrical behavior of the heart, especially during electrical stimulation.
My 1997 paper (IEEE Transactions on Biomedical Engineering, Volume 44, Pages 326–328), published 20 years ago this month, contains an estimate of the bidomain conductivities. After surveying much of the available experimental data, I found
  • Intracellular Longitudinal Conductivity     σiL     0.2 S/m 
  • Intracellular Transverse Conductivity        σiT     0.02 S/m
  • Extracellular Longitudinal Conductivity    σeL    0.2 S/m 
  • Extracellular Transverse Conductivity       σeT    0.08 S/m
This means that the ratio of the conductivity along the fibers to the conductivity across the fibers is 10:1 in the intracellular space, while only 5:2 in the extracellular space.

Hold on. In IPMB, Russ and I said σeLeT = 4:1, but now I am saying σeLeT = 5:2. Drat! IPMB is wrong. Another entry for the errata

The 1997 paper is highly cited: Google Scholar lists 178 citations. This perplexes me, because I have many papers that are more significant and innovative, but have far fewer citations. I guess usefulness can sometimes be as important as significance and innovation.

Friday, April 7, 2017

Radiopaedia

A screenshot of Radiopaedia.org.
Readers of Intermediate Physics for Medicine and Biology learn topics in medical physics from a physics point-of-view. Often, however, the discussion in IPMB doesn’t emphasize clinical applications. Where can you get more clinical information? Radiopaedia! Radiopaedia.org is a free online website with a large collection of radiology cases and reference articles.

To see what this site is like, I typed some terms into its search box. When I searched for MRI, I found articles about topics that Russ Hobbie and I present in Chapter 18 of IPMB, such as MRI pulse sequences and MRI artifacts, but also a wealth of clinical topics such as protocols for MRI brain screens, stroke, demyelination, and rectal cancer. The site also contains many case studies of specific patients. And it doesn’t cost a thing.

Radiopaedia has much information about nuclear medicine (Chapter 17 in IPMB). I typed “99mTc” into the search box and found articles describing a variety of radiopharmaceuticals based on the technetium-99m radioisotope. Also, the site has much information about positron emission tomography (PET) and single photon emission computed tomography (SPECT).

Radiopaedia covers the interaction of x-rays with tissue (Chapter 15 in IPMB) in a variety of articles about different mechanisms such as the photoelectric effect, Compton scattering, and pair-production. Many features of x-ray technology are also discussed (Chapter 16 in IPMB), like x-ray tubes, filters, collimators, grids, and intensifying screens. But also describes x-ray images of specific body parts, such as the abdomen, pelvis, ankle, and shoulder. And all this information is available gratis.

The web site discusses computed tomography qualitatively, but not quantitatively, and lacks much of the mathematics presented in Chapter 12 of IPMB. It contains many medical images, but almost no other figures. For example, the discussion of four generations of CT scanners would benefit from a figure, like Fig. 16.25 in IPMB.

Ultrasound is covered in Chapter 13 of IPMB, and also in Radiopaedia. Topics include transducers, pulse-echo imaging, elastography, and Doppler imaging. Best of all, this valuable information is on the house.

One of the best parts of Radiopaedia is the quiz mode for patient cases. You get to be the doctor, analyzing different medical problems. These cases are too difficult for me to diagnose, but perhaps you can. I find Radiopaedia to be a helpful, no-cost supplement to our book: IPMB supplies the math and physics, while Radiopaedia analyzes the clinical applications.

Did I mention that Radiopaedia is free?

Enjoy.

Friday, March 31, 2017

Top Ten Illustrations in Intermediate Physics for Medicine and Biology

I always love top ten lists, so I prepared a list of my top ten illustrations in Intermediate Physics for Medicine and Biology. These are a subjective, personal selections; you may prefer others. I excluded any figure that was reproduced in IPMB from another publication, so many of my favorite images are not listed. Except as noted, Russ Hobbie created these figures, and they appeared first in earlier editions of IPMB on which he was sole author.

A figure from Intermediate Physics for Medicine and Biology showing how radiation interacts with tissue using the program MacDose.

10. Figure 15.30. Although this figure is not the most attractive of those in the top ten, I selected it because it is based on Russ’s simulation program MacDose. Be sure to watch Russ’s video based on MacDose; it is a great learning experience.

A figure from Intermediate Physics for Medicine and Biology showing the extracellular potential produced by a nerve axon.
9. Figure 7.13. I helped create this figure when I was in graduate school. Russ asked my PhD advisor John Wikswo if he could supply two figures showing the extracellular potential (Fig. 7.13) and magnetic field (Fig. 8.14) produced by an axon. Wikswo asked me to do the calculations, and he had an illustrator in the lab produce the final drawing.

A figure from Intermediate Physics for Medicine and Biology showing a bone scan obtained using a scintillation camera.
8. Figure 17.19.  This scintillation camera bone scan of a 7-year-old boy is spooky, with ghostly radioactive hot spots. It is one of the many medical images Russ obtained from colleagues at the University of Minnesota. In this case, Bruce Hallelquist provided the photo. IPMB is much the richer for all the images provided by Russ’s friends.

A figure from Intermediate Physics for Medicine and Biology showing how radiation and electrons interact in biological tissue.

7. Figure 15.15. This figures illustrates the transfer of energy between photons and electrons. I like how it summarizes much of the chapter about the Interaction of Photons and Charged Particles with Matter in a single drawing.

A figure from Intermediate Physics for Medicine and Biology showing how blackbody radiatio depends on both frequency and wavelength.
6. Figure 14.24. New in the 4th edition of IPMB, this figure illustrates the blackbody radiation spectrum. It clarifies why the spectrum appears different when plotted versus frequency compared to when plotted versus wavelength.

A figure from Intermediate Physics for Medicine and Biology showing how tomography works.
5. Figure 12.12. This illustration defining the projection is critical to understanding tomography. Russ and I liked it so much that we considered using it on the cover of the 4th edition of IPMB, until Springer decided to go with their own cover design that didn’t include a figure from the book.

A figure from Intermediate Physics for Medicine and Biology showing a digital subtraction angiography.

4. Figure 16.23. This image, obtained using digital subtraction angiography, is another medical illustration provided by one of Russ’s colleagues at the University of Minnesota (Richard Geise). I chose it because it is stunningly beautiful.

A figure from Intermediate Physics for Medicine and Biology showing an image obtained using optical coherance tomography.

3. Figure 14.16. Color! This optical coherence tomogram of the retina was supplied by Kirk Morgan. A few figures in IPMB go beyond black and white, but this is the only one in glorious full color.

A figure from Intermediate Physics for Medicine and Biology showing an image of the brain and its Fourier transform.
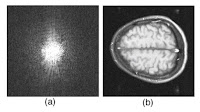
2. Figure 12.6. I like this magnetic resonance image of the brain because it helps build insight into how an image and its Fourier transform are related. It is the first of a series of six images in Chapter 12 prepared by Tuong Huu Le (University of Minnesota, also thanks to Xiaoping Hu) that, by themselves, provide a short course in image processing.

And the winner is….

A figure from Intermediate Physics for Medicine and Biology showing the behavior of the electrocardiogram.
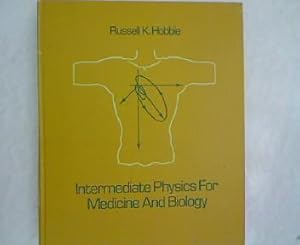
1. Figure 7.16. This picture of the direction of the dipole during the cardiac cycle nicely summarizes the electrocardiogram. My career has focused on the bioelectric behavior of the heart, so it is fitting that my top pick builds on that theme. The reason I chose it, however, is because it was on the cover of the first edition of IPMB, which I used in my first medical physics course taught by John Wikswo at Vanderbilt University.

A photograph of the cover of the first edition of Intermediate Physics for Medicine and Biology.

Friday, March 24, 2017

Enhancement of Human Color Vision by Breaking the Binocular Redundancy

Russ Hobbie and I added a discussion of color vision to the 5th edition of Intermediate Physics for Medicine and Biology.
The eye can detect color because there are three types of cones in the retina, each of which responds to a different wavelength of light (trichromate vision): red, green, and blue, the primary colors. However, the response curve for each type of cone is broad, and there is overlap between them (particularly the green and red cones). The eye responds to yellow light by activating both the red and green cones. Exactly the same response occurs if the eye sees a mixture of red and green light. Thus, we can say that red plus green equals yellow. Similarly, the color cyan corresponds to activation of both the green and blue cones, caused either by a monochromatic beam of cyan light or a mixture of green and blue light. The eye perceives the color magenta when the red and blue cones are activated but the green is not. Interestingly, no single wavelength of light can do this, so there is no such thing as a monochromatic beam of magenta light; it can only be produced my mixing red and blue. Mixing all three colors, red and green and blue, gives white light.
I know that some animals have dichromate vision (only two color receptors), as do some color blind people. Also, a few animals have tetrachromate vision (four color receptors). But I never imagined that I could have enhanced color vision just by wearing a pair of fancy glasses. Could I become a tetrachromat?

Yes! A preprint appeared recently in the biological physics arXiv by Mikhail Kats and his colleagues at the University of Wisconsin about “Enhancement of Human Color Vision by Breaking the Binocular Redundancy” (arXiv:1703.04392). Graduate student and National Science Foundation Graduate Research Fellow Brad Gundlach is the lead author of this fascinating paper. The abstract is given below.
To see color, the human visual system combines the responses of three types of cone cells in the retina—a process that discards a significant amount of spectral information. We present an approach that can enhance human color vision by breaking the inherent redundancy in binocular vision, providing different spectral content to each eye. Using a psychophysical color model and thin-film optimization, we designed a wearable passive multispectral device that uses two distinct transmission filters, one for each eye, to enhance the user’s ability to perceive spectral information. We fabricated and tested a design that “splits” the response of the short-wavelength cone of individuals with typical trichromatic vision, effectively simulating the presence of four distinct cone types between the two eyes (“tetrachromacy”). Users of this device were able to differentiate metamers (distinct spectra that resolve to the same perceived color in typical observers) without apparent adverse effects to vision. The increase in the number of effective cones from the typical three reduces the number of possible metamers that can be encountered, enhancing the ability to discriminate objects based on their emission, reflection, or transmission spectra. This technique represents a significant enhancement of the spectral perception of typical humans, and may have applications ranging from camouflage detection and anti-counterfeiting to art and data visualization.
I’d love to try out a pair of these glasses! I wonder whether they provide merely a subtle change in vision or offer an entirely new visual experience? Also, what would it be like to have each eye receiving different color information? Does the brain need to be trained to handle the additional information, or does it adapt easily? If the enhancement of vision is dramatic, I could easily see these glasses becoming the hot new gadget people clamor for this Christmas. And it all comes from applying physics to medicine and biology.